It's Just a Phase! Wrangling the Low Frequencies of Kicks and Basses
Everything in the low-end of a mix needs it's own space in order to deliver all the power contained in the large waveforms of the lower frequencies. When you have competing frequencies in the low-end, you can end up taking power away from (or destructively adding to) both elements through a phenomenon known as "phase cancelation", which is when the positive-value antinode of one waveform occupies the same point in time as the negative-value antinode of another waveform.
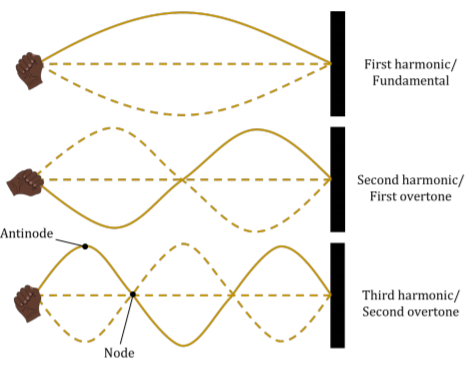
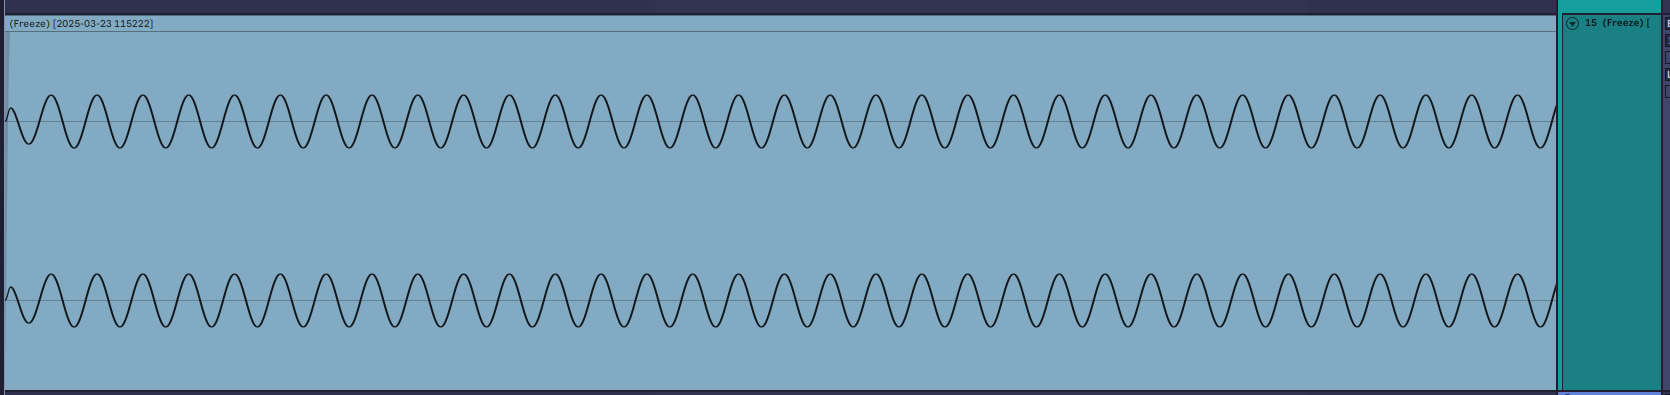
Using the above diagram as an example, phase-cancelation would occur if the solid and dotted lines were different instruments, such as the fundamental frequency of a kick and bass, Since the speaker cone can only occupy one point in space at a time. Remember, all a Sine wave is is the circumference of a circle laid out over time (32hz is effectively 32RPMs), and all sounds are made up of sine waves playing at different frequencies and amplitudes (aka harmonics). To demonstrate this load up your favorite plugin and create a Sine wave at a low frequency note (such as C0 which is ~32.7Hz) and bounce it out to a sample. You'll end up with a nice looking sine wave.
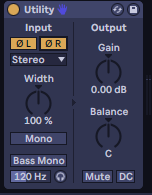
Now we'll need to make a copy of this sinewave but in an inverted phase. To do this in Ableton load up a Utility plugin and invert the left and right channels
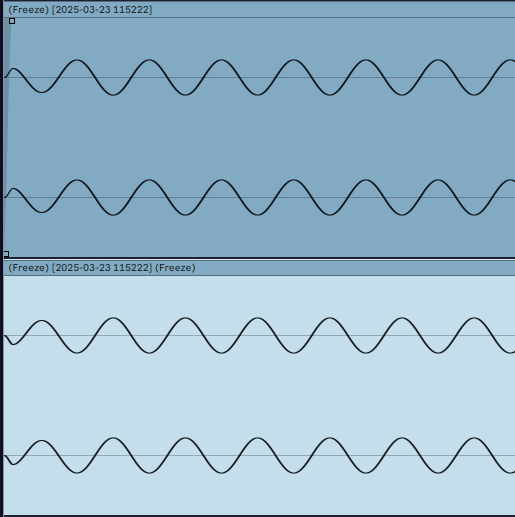
then freeze the track and drag and drop the sample to a new audio track. Unfreeze the first audio track and remove the utility plugin and we now have two sinewaves at the same frequency but opposite phases. You can see that the peak of one waveform occurs at the same point in time as the valley of the other. Now if you solo one track you'll hear the sine wave but as soon as you bring in the other track, the audio will go quiet. This is because the speaker cone is receiving equally opposite voltage values that result in a sum of 0. +1 + -1 = 0, +2 + -2 = 0, and so on.
So opposite values result in weaker signals, therefore values that aren't perfectly opposite of each other can result in stronger signals that we may or may not want. These two scenarios are destructive and constructive interference and we want to control these two interferences in the low end so everything has it's time and space to deliver it's respective power to the subwoofers.
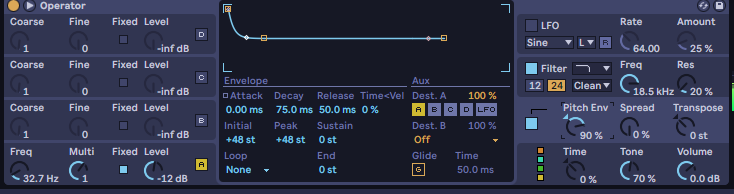
So what can be done about this? Taking a psytrance kick and bass pair into consideration, the tail end of the kick should be completely finished by the time the bass note immediately after begins. This is extremely difficult to hear so we'll need to view our waveforms with an oscilloscope. I use occularscope from Boom Shanka machines. Loading up an Operator plugin to make my basic sinewave kick. Making sure to bring everything in so the tail end of the kick is not eating in to the area where the bass note is playing. This Kick is a C0 (32.7Hz) sinewave sweep down from +48semitones and the amplitude envelope was set to make everything fit within the first 16th note.
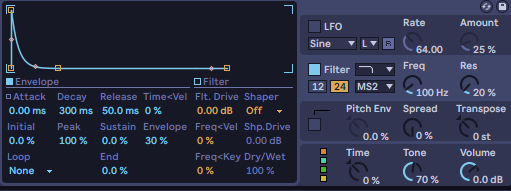
the small bit of waveform that is occupying the 2nd 16th note isn't too much of a concern since it's amplitude is fairly low. Next we want to ensure that the bass line isn't doing the same for the kick drum's initial hit. This bassline is made using operator and and 1 sawtooth wave playing 16th notes at C0. the filter cutoff is ~100Hz and modulated with the filter envelope.
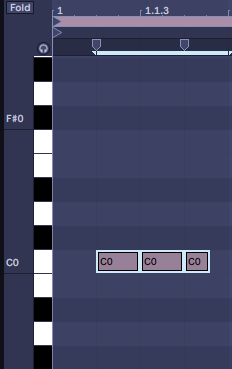
The last 16th note of the sequence is shortened to make sure the waveform isn't eating in to the 1st 16th note of the next bar.
Ensuring the upper harmonics of the open filter of the bassline aren't interfering with the transient of the kick.
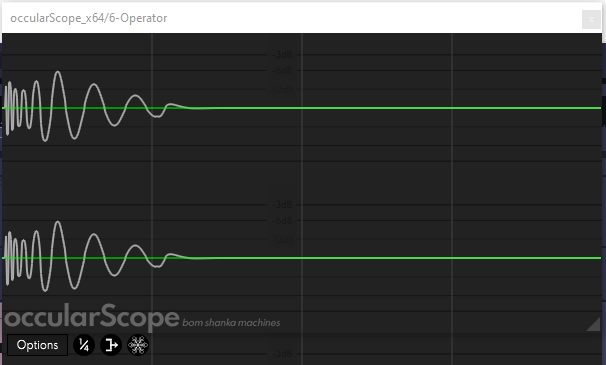
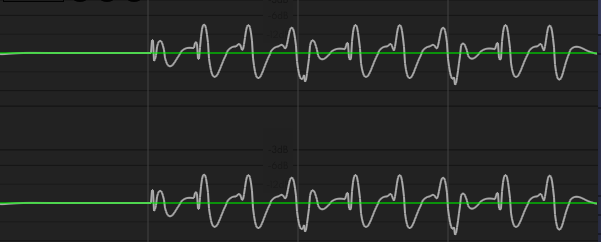 Altogether the wave forms look like like this:
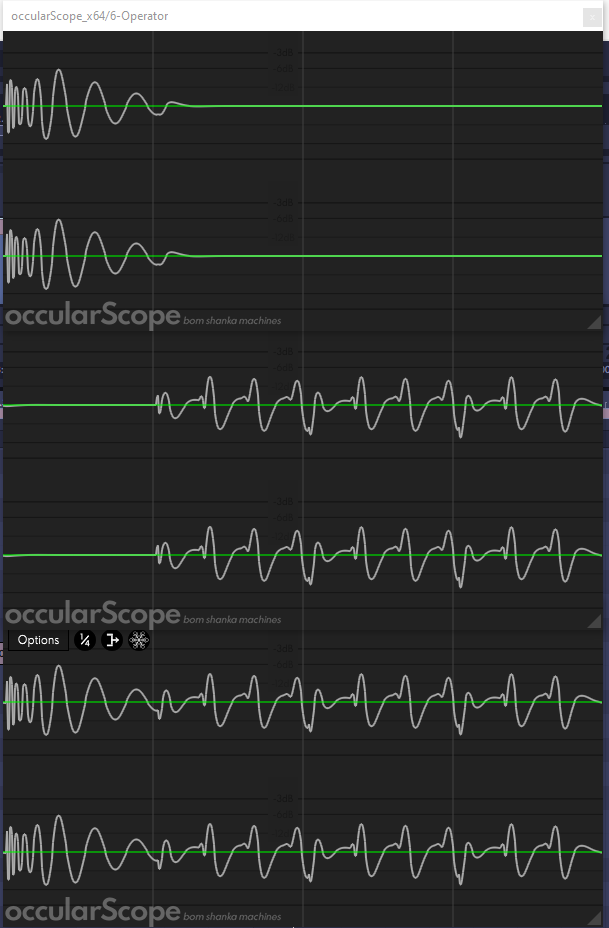
In the bottom oscilloscope window you can see where the tail of the kick interfering with beginning of the bassline. Where the lower-valued antinode of the kick is bringing down the upper-valued antinode of the bassline.
Combining everything with some wavetable sound design creates some nice psytrance. I chose to use psytrance as an example of this since the kick and bass live so close together in the mix. But the fundamental principals apply to any genre.
While modifying the evelopes is one way to provide room for elements in the low-end. There are other ways to give everything some room. For example Ableton's compressor plugin allows for sidechain compression to only react to certain frequencies. So you could find where your kick's frequencies overlap with you bass frequencies and have the compressor trigger only when it's signal imput matches that frequency. You could also play with the attack of your bass.